
Guía paso a paso del medallón inteligente
¡Gracias por elegir Totwoo! ¡Bienvenido a bordo!
Parte 1: Prepárate


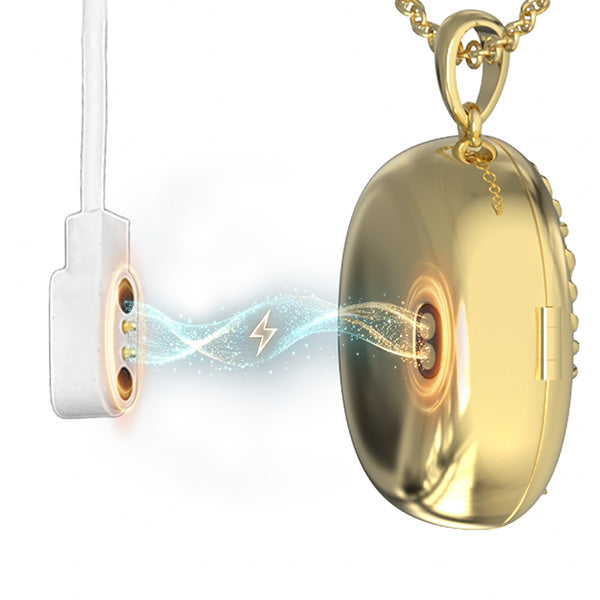
Paso 2 - Carga tu colgante AI Locket antes del primer uso.
Paso 3 - Asegúrate de que el Bluetooth de tu teléfono esté activado.
Parte 2 - Conecta tu relicario
Paso 1 - Abre la aplicación Totwoo y sigue las instrucciones de la aplicación para iniciar sesión.
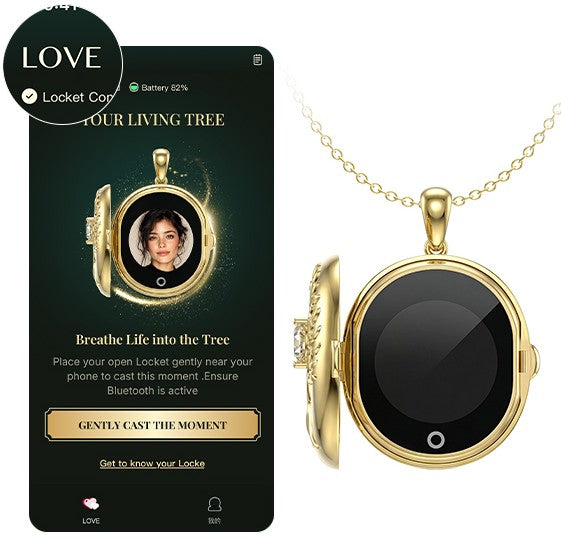
Paso 2 Asegúrate de que tu Locket tenga suficiente batería. Pulsa «Me encanta» en la esquina superior izquierda de la aplicación, abre tu Locket y espera a que la aplicación lo reconozca. Tu Locket se conectará automáticamente a la aplicación mediante Bluetooth.
Parte 3: Conozca su relicario
Feature Overview: Upload photos or videos through the app. When you open your Locket, it will automatically display the content you’ve transferred. The instructions below will guide you through the upload and creation process.
1. Upload Photos/Videos
1.1 File Selection Options:
- Select photos or videos from your phone's gallery
- Capture them directly using the camera
1.2 Upload Quantity and Feature Limitations:
- Photos: Supports up to 9 photos. Press and hold a photo in the App editing screen, then drag to reorder. Photos will be displayed on the Locket in the selected order.
- Video: Supports up to 1 video, with a maximum duration of 5 seconds and a file size of up to 7 MB.
- Photos & Video: Each Locket can contain up to 1 video + 9 photos, and photos and video can be uploaded together.
- Display Order on Locket: The video always appears first, followed by Video → Photo 1 → … → Photo 9. If there is no video, playback starts with Photo 1.
To ensure the best display results:
- When cropping, make sure the main subject is fully positioned within the guide frame.
- Use clear, well-lit original photos.
- Front-facing images significantly improve the final output quality.
- Keep the Bluetooth connection between your phone and the Locket stable during upload.
2. AI-Generated Animation
2.1 Before Generating, Please Make the Following Selections:
- Object Type: Single Person / Multiple People / Pet
- Animation Style: Choose a playback angle that matches the sample images. For best results, use clear, unobstructed photos with a similar shooting angle.
2.2 AI Generation Limits and Notes:
- After generation, you can preview the animation and confirm the result before transferring it to your Locket.
- Each Locket device includes 10 AI animation generation credits.
- Once you’ve used all 10 credits, you won’t be able to generate any new AI animations.
- However, previously generated animations can still be reused from the History section.
3. Playback Instructions
After opening the Locket, the screen will automatically display the transferred content:
- Single photo: Displays a static image or an AI-generated animation
- Multiple Photos: Photos are displayed in a loop according to the order set in the App.
- Video Only: The original video plays directly.
- Video & Photos: The video always appears first, followed by Video → Photo 1 → Photo 2 → … → Photo 9.
- Default Display on Opening: Each time the Locket is closed and reopened, the display resets to the starting position. If there is a video, it returns to the video; otherwise, it returns to Photo 1.
4. Touch Interaction Guide
A touch control is located below the Locket screen for switching content, controlling video playback, and waking the screen.
- Multiple Photos: Tap the touch control to switch to the next photo.
- Video Only: After the video finishes playing, press and hold the touch control to replay the current video.
- Video & Photos: Tap: Switch to the next item in a continuous loop: Video → Photo 1 → Photo 2 → … → Photo 9 → Video. Press and Hold: When viewing a photo, press and hold to quickly switch to and play the video. If the video is already selected, press and hold to replay it.
- Wake Screen: After the screen turns off automatically, tap the touch control to wake it. The content displayed before the screen turned off will remain on screen.
5. Bluetooth Transfer Notes
To Ensure a Smooth Transfer, Please Note the Following:
- Do not leave this page or close the Locket’s cover during the transfer.
- Keep your phone close to the Locket.
- Do not turn off Bluetooth.
- Ensure the battery is sufficiently charged (at least 20%), as low battery levels may affect transmission success.
6. History and Content Reuse
What You Can Do in History
- You can view or download previously uploaded photos, videos, and AI-generated animations.
- You may also retransmit any saved content to the Locket.
- Re-downloading or retransmitting AI-generated animations from History does not consume additional generation credits; even if all credits have been used, previously generated animations can still be reused freely.
- All history is stored locally and will not be uploaded to the cloud.
7. Storage Location
- Photos, videos, and AI-generated animations are stored only in the uploader’s App account (saved locally on the phone and not uploaded to the cloud), and are also saved on the Locket device.
- If a Locket with existing content is given to someone else, the original content will not be automatically synced to the recipient’s App account.
- When the recipient registers a new account and uploads new content, the original content on the device will be replaced.
8. Battery Life & Usage
- A single full charge supports hundreds of video playbacks.
- To maintain the Locket's exquisite and compact design, battery capacity is naturally limited, To extend usage time, the screen will automatically turn off shortly after playback ends.
- When the screen is off, simply tap the touch point below the screen to wake it up again.
- May this fleeting glimmer of memory be enough to soothe your heart and heal your moments.
Si tiene alguna pregunta, póngase en contacto con nosotros. support@totwoo.com.
